Is your roof looking a little worse for wear?
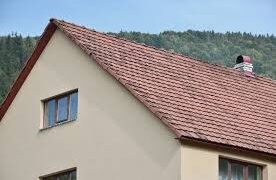
Your home’s roof is your first line of defense against the elements. It endures storms, the blazing heat, and ice dam formation. It shouldn’t come as a surprise when you find out that your roof needs repairs after what it’s been through.
Nowadays, shingles are the go-to roofing materials for most households. It only makes sense that you learn how to replace shingle roofs if you want to maintain your home. How do you go about replacing them without professional help, though?
Hiring contractors is always an option, but if the damage is minimal, it’s best you do it yourself. Read what we’ve prepared below to learn how to go about roof shingle repair to make your home feel safe again.
Prepare Your Tools and Materials
First, prepare everything that you need for the task. You’ll need a good number of tools if you want to ensure all goes well. Among these, the most important tool in the job is a flat pry bar.
This will allow you to remove any damaged element for shingle replacement. You can make do without it, though, using the hook blade attachment on a utility knife or such. However, it will take longer and can break shingles apart even more when using such instruments.
You’ll also need a caulk gun, a hammer, and roofing nails to set the new shingles once you’re ready to install them. Speaking of the shingles, you’ll want to get ones that match your current style.
Doing this is preferable to having mixed patterns on your roof. The only time to buy shingles of different styles is when you’ll replace the entire thing. You’ll want to know how much a whole roof replacement will cost, though, which you can learn about when you click here.
For houses with an asphalt roof, you may want a caulk tube with mastic asphalt. It will stick better and help the new shingles settle on the roof faster. It’s a must-have when working in high-temperature states.
Lastly, you’ll want some bungee cords for safety purposes. Use these to anchor your ladder to your home later on. There’s nothing worse than knocking down your ladder and getting yourself stuck on your roof with no way to get down.
Prop Up Your Ladder Right
Never underestimate the importance of setting up your ladder. As mentioned above, doing so prevents you from getting yourself stranded on your roof. Proper ladder placement follows the 4:1 ratio.
The ratio expects that for every four feet you climb on your ladder, the base must be one foot away from the house. It’s essential to do this to ensure the ladder’s stability as you climb up. By doing so, it won’t slip from under your feet or sway with your weight on top.
For added security, nail the bungee cords to the wall and connect them to your ladder. Make sure the top extends at least three feet above the top of the house. This will make mounting it easier later on.
Assess the Damages
Once you’re on top, it’s time to assess the damages. Properly doing this means you need to remove the damaged shingles first. Your flat pry bar will make the process easier.
Insert the pry bar under the bottom of the damaged shingles. With enough pressure, you will feel the shingle’s sealant strip break. You can then remove the nails on the shingle and the surrounding area with your pry bar.
You’ll see more of the extent of the damage after removing all broken shingles. If the roof deck sustained considerable damage, fix it. Ignoring this means you risk water damage to your home.
Repairs begin by removing all the rotten or damaged pieces and replacing them. Find new pieces with comparable material and durability when replacing them. Doing so gives you near-perfect protection if paired with weather and water insurance.
Replace the Underlayment
With the new roof deck installed, replacing the underlayment comes next. The underlayment serves as a secondary form of protection. Without it, your roof becomes more susceptible to the elements.
Lay the underlayment where needed and fasten it with roofing nails. You can also use staples for quicker fastening since it won’t move much under the shingle, anyway. However, remember that the underlayment must be up to code.
Consult the local governing body to know what counts as up to code for standard housing in your area. Some municipalities will even prevent you from using staples to fasten underlayment for your roof.
Install New Shingles
Installation is the next step in roof shingle repair. First, make sure the shingle fits its spot on the roof. If it’s too big, you can always trim it down to size.
Once laid in place, secure it to the roof with nails. The general rule when doing this is to avoid using the same nail holes as the previous shingles used. It would be easy for your new shingles to jostle out of place if that were the case.
Also, refer to the material wrapper to know the proper nailing instructions for your new roof shingles. Manufacturing companies often place guides there to prevent having customers break shingles accidentally.
Refasten and Secure
With all the new shingles in place, it’s time for you to secure them. Do this by using the caulk gun loaded with mastic asphalt. Insert the gun between the newly placed shingles and squeeze a small bead within.
It’s ideal to squeeze some in the areas where the shingles still feel loose. The holes where the nails of the previous shingles were are good examples of such areas. The mastic asphalt will serve as a replacement for the sealant strip you broke off beforehand.
Learn How to Replace Shingle Roofs Today
Your roof insulates, protects, and will keep your home safe from the elements, but only if it’s in peak condition. Learning how to replace shingle roofs helps you achieve having a stable home. Replace all the damaged roofing shingles and enjoy a cozy home today!
Do you want to learn more about home management and maintenance? We have guides that help you learn what you can do in every room of the house. Check them out and learn something new today!