Tiles may be a terrific way to add flair to your next home renovation. Moreover, you could breathe new life into a kitchen or replace the floor in a bathroom with tiles. There are various designs and styles to pick from, ranging from small subways and mosaic tiles to big ceramic tiles. Likewise, all of these look fantastic in a variety of settings.
Grouting is definitely an important component of the process of laying new tiles. Nevertheless, it is a very simple skill to acquire, but equally easy to get wrong. Correct tile grouting ensures a firm seal, better water resistance, and dirt protection. Therefore, all of these are crucial for a lovely finish. Some grouts even include fungicide and PVA to help with adhesion.
Well, if you are wondering where to get the right guide on how to grout tiles, then worry not. In this article ahead, we shall show you how to grout walls and floor tiles step by step. Hence, scroll over and read on.
Reasons To Grout Tiles
After installing your tiles in a flawless grid or chevron pattern, apply the grout to finish the work. If things have started appearing a little dirty, you can also replace the old grout with a new batch. Did you know that grout has a huge influence on the final look of your tile project? It is not the most expensive material you will employ in a makeover though. Grout comes in a variety of hues. Moreover, you can use it to provide contrast or create a sleek single-shade space.
However, before you get your trowel out, make sure you are ready for the job. Poorly grouted tile is not only unsightly but also less sturdy and more prone to chip or require repairs.
Types of Grout
BAL Wall Grout
Suitable for interior and outdoor walls with 1-3 mm grout joints. For use on ceramic, marble, limestone, and travertine wall tiles only. Since it is water repellent, it is suitable for intermittent wet locations such as residential showers. With the addition of BAL GT1, you can use it on porcelain tiles, power showers, and walls with minimal movement. Available in white and grey.
BAL Wide Joint Grout
Both interior and exterior floors are suitable for 2-12 mm grout joints. For use on ceramic, marble, limestone, and travertine floor tiles only. Since it is water repellent, it is suitable for intermittent wet locations such as residential showers.
BAL Microflex Wall Grout
Both interior and exterior walls are suitable for 1-5 mm grout joints. You can easily use it on any sort of wall tiling. Since it repels water, it is great for wet room walls and power showers. Microban antibacterial protection is inclusive. Available in white.
BAL Superflex Wide Joint Grout
Both interior and exterior floors are suitable for 3-20 mm grout joints. Except for glass and metallic tiles, you can use them on almost any type of floor tile and substrate. It is not apt for usage on a floating floor. However, as it is water repellent, you can use it in wet rooms and power showers. Ideal for high-traffic areas. Available in white, grey, and limestone.
BAL Micromax2 Wall & Floor Grout
Interior and outdoor wall and floor grout joints of 1-20 mm are suitable. Perfect for wet room walls and floors, as well as power showers, on all types of tiles. Microban antimicrobial protection, water repellency, and efflorescence resistance are all features of this grout. Ideal for high-traffic areas. There are over 20 colors to choose from, some of which also have matching sealants.
BAL Easypoxy AG
Both interior and outdoor walls and floors are suitable for 2-12 mm grout joints. In addition, you can also use it on any sort of tile. Wet room walls and floors, power showers, and commercial food preparation rooms are also suitable. Moreover, BAL Easypoxy AG is completely waterproof and does not allow the entry of bacteria or dirt.
Azpects EasyJoint Grout
Only for external floors with 3-12 mm grout joints. For use on any sort of outdoor paving or tiles. EasyJoint works best on a permeable, free-draining basis. In addition, you can also use it for walks, patios, and driveways.
Materials Needed To Grout Tiles
- A cloth
- Clean bucket
- Water
- Dust mask
- Gloves
- Sponge
- Caulk
- Blue painter’s tape
- Mixing paddle
- Safety glasses
- Drop sheets
- Grout float
- Tarp
- Grout powder
- Masking tape
- Mix grout
- Rubber grout float
- Wonder Wipes
- Microfiber Cloth
How To Grout Tiles in Steps?
1. Set up your work area
Preparing your work area is the first step in grouting tiles. Before doing anything else, lay out some dust sheets on the floor. Further, secure them using masking tape if you are dealing with wall tiles. Henceforth, there will be less mess. Besides, you will not even have to spend as much time cleaning up after you have finished.
Preparation is the key. If you do not prepare your joints, you will fail. In addition, carve off any excess glue, dust, or other particles from your tiles. Take care not to chip them, but try to get right in there and smooth out the grooves between them. Once you finish removing the bigger particles, the vacuum between those to remove any remaining smaller particles and dirt.
Additionally, make sure you are wearing any necessary health and safety equipment. Moreover, put on safety glasses to prevent extra grout from flying into your eyes. Likewise, you may also need some Wonder Wipes to cut down on the time you spend cleansing your hands.
2. Choose Your Grout
Cement-based (with or without latex), epoxy, and urethane are the three basic types of grout. It is vital to know your options when it comes to installing floor tile, a kitchen backsplash, wall tile, etc.
Color of Grout
There are several choices when it comes to choosing the grout color that would work best in your space. Decide if you want the grout lines to match or contrast with the tiling first. A wall of white ceramic tile with light-colored grout in the shower or kitchen gives it a spotless, clean look. Additionally, a wall of white ceramic tile with light-colored grout for a highly sleek vibe. Note that pure whites are the most difficult to keep clean, so choose a light beige or grey instead.
However, if you would like to go a bit more creative with your tiled space, try out different grout colors. Colorful grout pop-up bathrooms and rooms have become a recent trend. These elements, whether yellow, blue, or pink, add a pop of color to your most-used areas. Darker grout is a better choice for high-traffic areas. Hence, before making a final decision, visit your local hardware store and go over all of the options.
3. Mix The Grout
Since different products have varying setting times, reading the directions before mixing the grout is essential. Before adding the necessary amount of water, pour enough grout powder into an empty bucket to last 30 minutes. Well, more water will result in the slurry drying out. The grout should have the consistency of clotted cream. Hence, if it is too hard or too soft, add additional water or powder. Allow 10 minutes for the mixture to sit before using it. In addition, remember to stir it every 15 minutes or so to keep it from drying out.
However, use as little water as feasible while mixing the grout as much as possible. A thorough mixing ensures that the color is consistent throughout the grout.
4. Apply The Grout
Now it is time to spread the grout on the floor. We recommend testing the grout on a small part of tiles first to ensure compatibility. It might happen that after completing the entire project, you discover that you have used the wrong sort of grout. In such a case, it will be a very tedious process to remove it all and start over. You should start with a small area to work on. Hence, making a mock-up first is usually a smart idea. Use a board roughly 18″ by 18″ with tile laid and then grouted to see how it will appear. Likewise, 1m by 1m sections are usually a decent size.
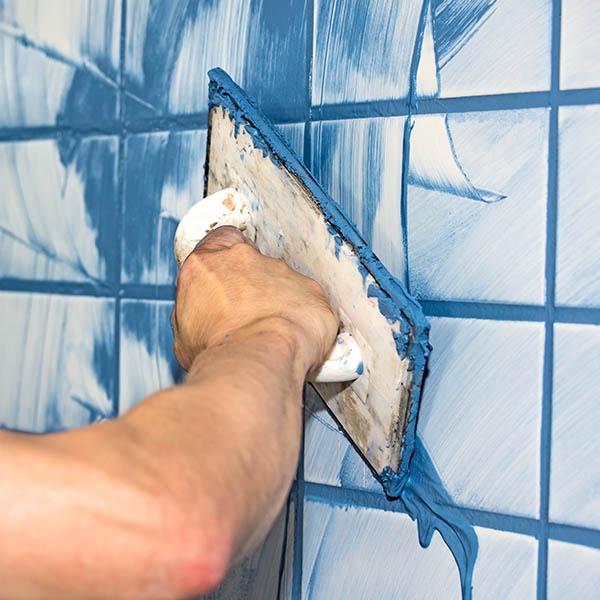
 To prevent the grout from drying up, divide your project into manageable portions. Further, using a rubber float, scoop up a little bit of the grout mixture. Next, apply it over the joints between the tiles. Strictly avoid metal floats, as they can damage your tiles. To get the mixture right in between them, angle the float at 45°. Make sweeping arcs and work the grout totally into all the joints between the tiles. You can also use the rounded corner of the float to compact the grout into the joints. If the grout is not compacted, it will lose its strength. Thus, continue to fill in the gaps with extra grout until all of the joints are filled. It is vital to remember that grout should only be used between two sets of tiles. Leave any cracks between tiles and other surfaces empty and caulk them later on.
5. Scrape away any Extra Grout
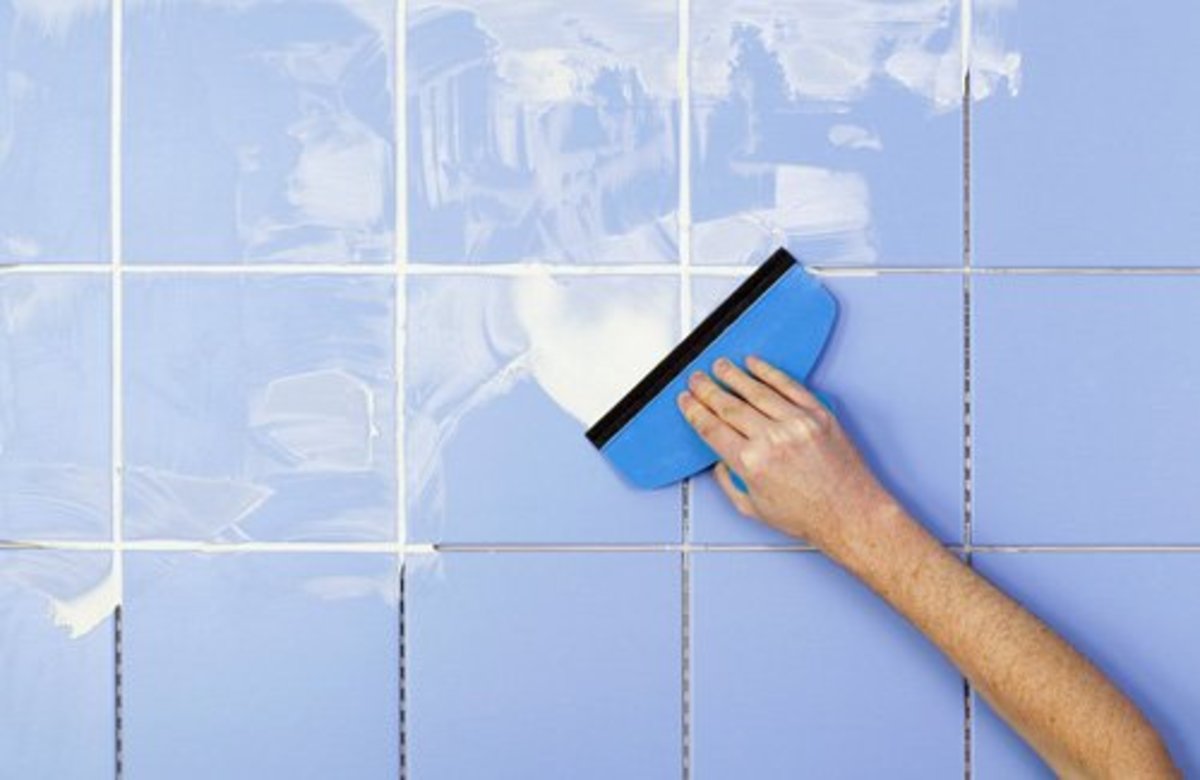
Allow the grout to dry for the period specified by the manufacturer before applying the sealant. Furthermore, use a small paintbrush or a sealer applicator to apply the sealant. With the rubber float, remove any excess grout from the tiles. You can also make this operation easier by angling the float at 90°. Spend as little time as possible on this because you will have to clean it up later.
6. Shape Your Grout
To form your grout, use the rounded corner of the float or the back of a toothbrush. This will also compress the grout, thus preventing it from cracking or weakening in the future. While doing this, be careful not to remove too much grout.
7. Remove any excess grout with a damp cloth
Fill an empty bucket with water. Additionally, dip the sponge into it 30 minutes after initially applying the grout. Further, wipe any excess grout off the tiles with the sponge. It is important to focus on the tile’s surface rather than the joints. If at all feasible, use a hydrophilic sponge for this task, as these are more suited to fragile surfaces.
8. Ensure that the tiles are clean
We recommend allowing your tiles to dry for another 30 minutes after removing excess grout with a moist sponge. Nonetheless, you may see a tiny layer of powder on them at this point. Therefore, buff the tiles with a microfiber cloth to remove this powder. Thus, this leaves a clean, shining appearance.
9. Caulk the adjacent joints
The last step is to caulk any remaining cracks between tiles and other surfaces. Depending on the situation, there is a variety of caulks to pick from. Forever White is perfect for bathroom conditions. On the other hand, Caulk Once or Everflex 125 One Hour Caulk are ideal for other needs.
10. Let it Dry
Different types of grouts take longer to fully solidify. So pay attention to this, read the instructions on the product you have chosen. Moreover, keep the area totally dry during the process.
Once the grout is dry, you can enjoy your newly grouted wall or floor for years to come. Use the LTP grout and tile protector spray in wet areas like showers, bathrooms, and kitchen splashbacks. Thus, this helps to create a protective surface on the tiles that reduces limescale and grime buildup.
How To Grout Tiles With a Float?
The application of grout is more of a shotgun method than a laser-targeted one. Scoop wet grout in large mounds into the whole tyre surface, including seams and tile surfaces. Further, wipe the grout over the tile. While grout adheres to the tile seams, it does not adhere to the tile surface. Thus, excess material is collected and re-deposited on the tile.
A rubber grout float comprises a rectangular non-stick gum rubber or soft nylon pad. The pad is hard but flexible and avoids material absorption. It is the only way to apply grout properly.
Use a C-shaped handle to hold the float. Grouting using a float entails filling the joints with freshly mixed grout and scraping the surplus grout from the tiles. It is a simple yet elegant technique that tile installers have been using for centuries.
/GettyImages-838913588-5c33365246e0fb0001c8c208.jpg)
There are two types of rubber grout floats – wall floats and floor floats. While wall floats have softer rubber cushions, floor floats can be rather stiff. Moreover, wall floats are easier to use and better for reaching into corners. Thus, this makes them a better all-around option for new tilers.
How To grout Tiles Without a Float?
An alternative to a float can be a grout bag. It may be the answer if you are looking for grout application suggestions for porous or uneven tiles. Fill the bag with the ready-to-use grout. It has a tip on it that allows you to direct the grout into the joints. However, it does not distribute evenly all over the surface. The grout fills up the cracks as you twist and squeeze the bag. Hence, for obtaining the best results, work in small batches and apply even, steady pressure to the bag.