Table Saw Sled: If you own a table saw, you know it works great for ripping long pieces. But did you know that you can crosscut wide pieces with the same ease and accuracy? Or make perfect 90- and 45-degree miter cuts on narrower boards? All it takes is a table saw sled.
A table saw sled rides in the miter gauge slots and has a fence that’s mounted exactly 90 or 45 degrees to the blade, enabling accurate square or 45-degree cuts. We’ll show you how to build a sled for each application, using a 42-in. a square sheet of 1/2- or 3/4-in. plywood, particleboard or MDF. We’ll tackle the crosscut sled first.
Cut Table Saw Sled Base and Fence Parts
I grabbed a large piece of ½” plywood and cut it down to 36 inches wide and 24 inches deep for the table saw sled base. This is a bit larger than my old one for a little more capacity.
Cut Fences to Size and Mount Runners
Next, I cut one end of the long back fence square. Then marked for the other cut using the table saw sled base. The length of the short fence doesn’t matter so I cut each end square. Then I put a round over on all the exposed edges.
Add Integrated Table Saw Sled Stop Block
Before mounting the fences I wanted to add a handhold to the end of the table saw sled. I used a 1-½” Forstner bit to establish the ends of the hand slot.
Attach Fences to Crosscut Sled
While I was at the router table I added a ⅛” by ⅛” recess to the bottom of the back fence. This will give the sawdust a place to go so it doesn’t build up between the workpiece and your fence and throw off your cuts.
Table Saw Crosscut Sled
Attach One Miter Bar To The Sled Base
The problem of how to align both bars to the slots is gone. And don’t make it. Buy a steel or aluminum one from a woodworking supply store. That way you don’t have to fuss with trimming a wooden one to fit, and you don’t have to worry about the wood bar expanding and no longer fitting in the miter slot. Also, metal ones are durable. You can use them over and over.
Glue And Screw A Fence To The Front And Back Of The Sled
They’re just there to hold the two halves of the sled together after you cut the kerf through the base. So, they don’t need to be square to the cut and their faces don’t need to be square to the blade. Of course, you shouldn’t glue them down at 45 degrees to the blade, either. Just get them close to square to the blade. Also, they should be taller than highest you’ll raise the blade.
Cut the Kerf
Cut the kerf. Use the blade that you intend to use with the sled. That way, the kerf is zero-clearance and you won’t get tear out on the bottom of your cuts. Then, use only that blade with the sled. That’s how I do it and my sleds last for years.
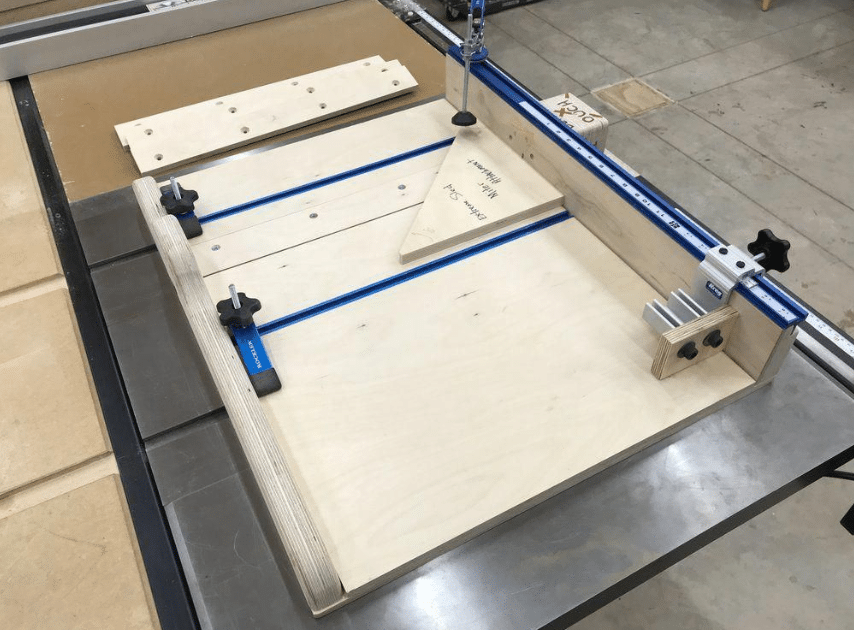
Attach A Second Fence Square To The Kerf
Here’s how to get it square. First, screw-down one end of the fence. Next, use a combination square or drafting square to align the fence square to the kerf. Clamp it in place and check to make sure it is still square (clamps can move a workpiece as the pressure is applied). Screw down the fence at the other end. It’s now secured at both ends and square. Put in a few more screws and check to make sure that the fence is square along its entire length. A tip: Make the fence for the workpiece taller than the other two.
Table Saw Sled Runners
If you don’t have a zero clearance throat plate for your table saw, I would strongly suggest making one first. Factory throat plates typically have a wide gap next to the blade.
We use the zero-clearance because cutting small pieces (like runners) can be dangerous, as the workpiece at a certain point will be barely resting on anything, and free to drop down beside the blade, which is an unsafe situation.
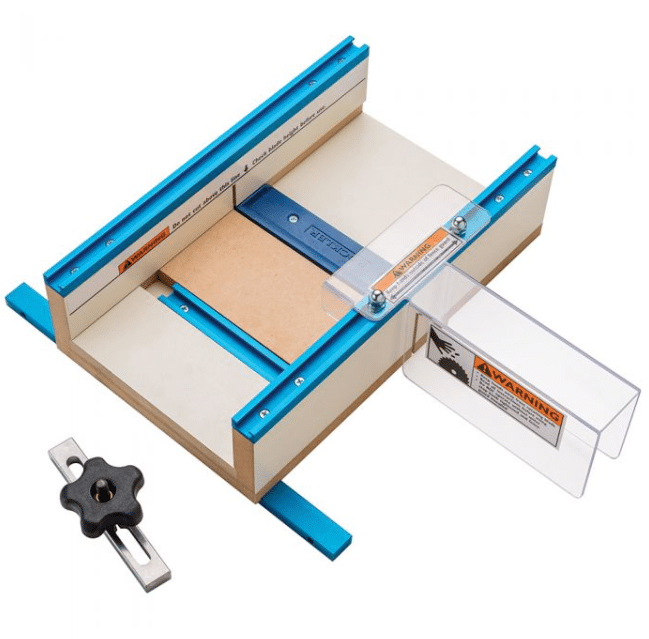
Designed this specifically for shaving off roughly 1/64″ or less from the edge of runners and inlay. It’s essentially planing the edge, but instead of moving the plane across the wood, you’re moving the wood across the blade.
Diy Table Saw Sled
Table saws of all kinds are invaluable tools that you can use for a whole range of different cuts. Many people consider them to be the most important tool in the woodworker’s toolkit, but if you want to unleash its full power, you’ll need to get your hands on a range of jigs and sleds.
How Does A Table Saw Sled Work?
A sled is a movable contraption that slides in the table saw’s factory- machined miter gauge slots. The workpiece then rests against a wooden fence at the front of the sled, a setup that keeps the work from slipping and ensures a clean, perfectly square cut every time.
How Do You Make A Table Saw Crosscut Sled?
Step 1: Attach one miter bar to the sled base. Attach one miter bar to the sled base.
Step 2: Glue and screw a fence to the front and back of the sled. Glue and screw a fence to the front and back of the sled.
Step 3: Cut the kerf. Cut the kerf.
Step 4: Attach a second fence square to the kerf.
Can I Use A Table Saw Instead Of A Jointer?
Using Your Table Saw as a Jointer. Even if you own a jointer, you’ll want to master this technique. With the addition of a simple shop-made fence, you can easily edge joint on your table saw. Remember that man-made materials like plywood can be hard on steel jointer knives – but not on carbide table saw blades.
Why Do I Need A Crosscut Sled?
A typical crosscut sled is fixed at 90 degrees, has a zero-clearance kerf, and provides backer support through the blade and for several inches or even feet on both sides of the blade (depending on the size of your crosscut sled and back fence.